
Warrior 1 - All you need to know!
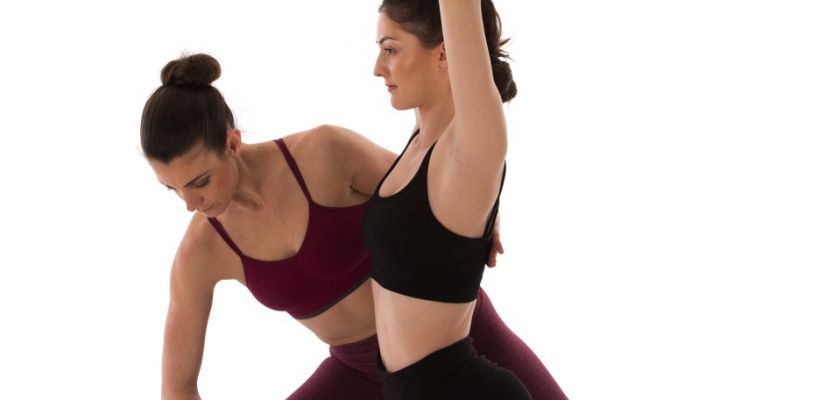
Would you like to have everything you need to know about Warrior 1 in one place ..well here it is! We have preivously done a blog like this on Warrior 2, so we thought it was about time we also looked at Warrior 1.
Although Warrior 1 and Warrior 2 have very similar names they are very, very different!
So in this blog we'll be explaing how to verbally teach this pose, but also safely adjust students. If this is something you find interestong and would like to know more, we have our Yoga Basics course, or if you think you'd like to teach we have our 200hr Yoga Teacher training which will give you all the tools to teach, and after if you'd like more we have our 300hr Yoga Teacher Training - or you could jump straight onto the 500hr Yoga Teacher Training.
Although verbal cues and self adjustments are always best, there are of course occasions where a passive or hands on assist can really bennefit a student. The beauty of assisting is that you can really shed a light of awareness on a posture for some stuents that will stay with them forever, they will feel that posture in a whole new way, a way in which verbal cues alone wouldn't have helped them reach. So if you're already qualified, but 300hr training isn't for you right now, you can still have the option to learn what is an incredibly powerful tool with our Mastering the Assist CPD.
So a few things to note before we look at how to adjust:
Who shouldn’t do Warrior 1?
Students with shoulder injuries should keep hands on hips.
Students with knee issues can lessen the bend of the front knee joint or avoid the lunge.
Students with acute sacroiliac problems can perform high lunge pose instead.
What are the benefits of Warrior 1?
Expands the chest to facilitate deep breathing.
Tones the calf muscles and strengthens the legs.
Energises and builds stamina.
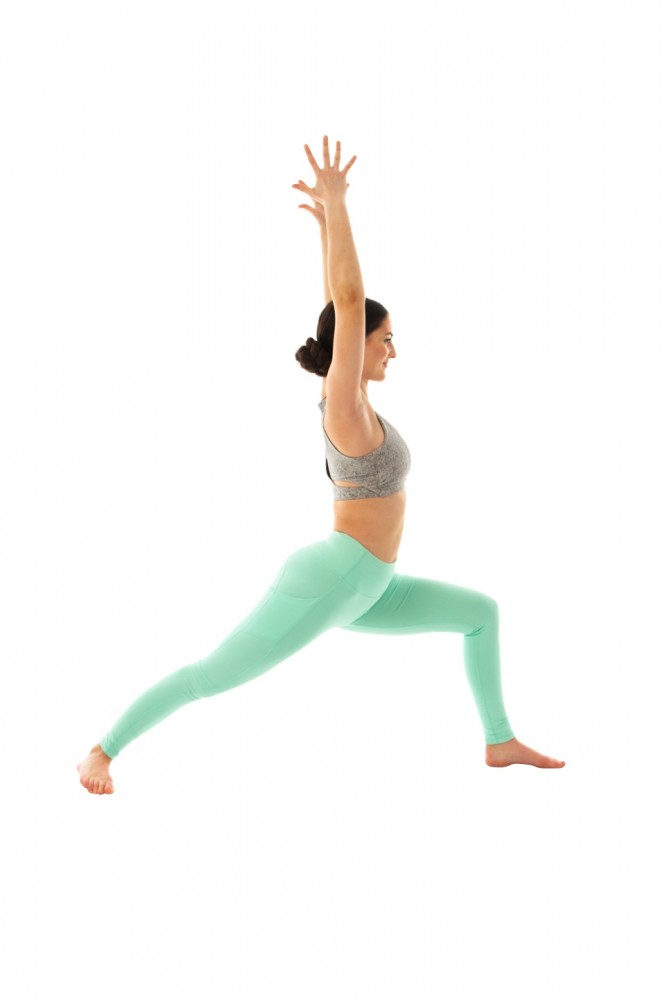
How do you do Warrior 1? (right side)
Step the right foot through the gates of the arms.
Release the back heel down turned out approx. 45 degrees.
Check the front knee is directly over the top of the ankle.
Lift the back kneecap upwards to engage the quadriceps.
Square off the hips by moving the back hip forward so both hip bones are facing forward.
(Step back foot wider if needed).
Extend arms towards the sky.
Depress the shoulders down the back.
How do you adjust or assist students in Warrior 1?
As with any assisting there a few things to consdier first ..have you offered a verbal cue? If the answer is yes, then you need to consider offering it in a different way. If you do this and it's still not having the desired effect, then it's time to consider stepping in, after you have sought permission from your student - the most important rule!
With any adjustment we should work from the foundation up. So check in with the feet first to ensure they are where they should be. So for Warrior 1 the front foot should have the toes pointing forward, and the ankle sitting directly underneath the knee. The back foot should be at about 45 degrees and should be pressed firmly into the mat, with particular focus on the outside edge of the foot - this is where we find a common misalignment in that some students do not press actively through the outside edge of that foot, and therefore it lifts from the mat, and in doing so means that the back knee starts to rotate inwards which can cause injury. So to simply adjust this we can step onto the outside edge of the students foot with our foot, and gently press down. If that assist isn't quite for you, we can offer the same with our hand. This should encourage the knee to become straight, however if it doesn't, we can place the palm of our hand to the inside of the students thigh, just above the knee and gently encourage some straightness.
Next we would look at the front knee, we want that knee to be stacking directly over the front ankle. A common misalignment here is that the knee will either sit too far behind, overshoot the ankle, press out and away from the body too far, or fall inwards. To correct this we can place our hand in front of the knee, and ask the student to bend further in towards the hand to bring the knee over the ankle, unless there is a reason that there is less bend in the knee such as an injury. If the knee is overshooting we can place our hand onto the knee and gently press it back whilst communicating our intention with the student. If the knee is pressing out to the side or falling in, we can place the palm of our hand on the relevant side of the knee, and ask the student to move the knee towards our hand to square it over the ankle.
Next we would look at the hips, and here we want the hips to be square towards the front of the mat. If your student needs assistance here we can firstly offer a verbal cue for the student to place their own hands onto their hips and if they need more space to enable the hips to square they can step the back foot out towards the side of the mat to create more scope to square. If your student still requires assistance after this, we can come behind the student explaining that's where we're approaching them from, and place your hands on either side of the hips and square them into the correct direction.
Moving up from the hips we're going to be looking at the shoulders and arms, so here we want the arms striaght overhead, palms facing towards each other and the shoulders relaxing down. A common misalignment here is that the shoulders lift up towards the ears, so we can place the palms of the hands gently on top of the shoulders and ask the student to relax down, aiding them in understanding that they need to drop their shouldrs.
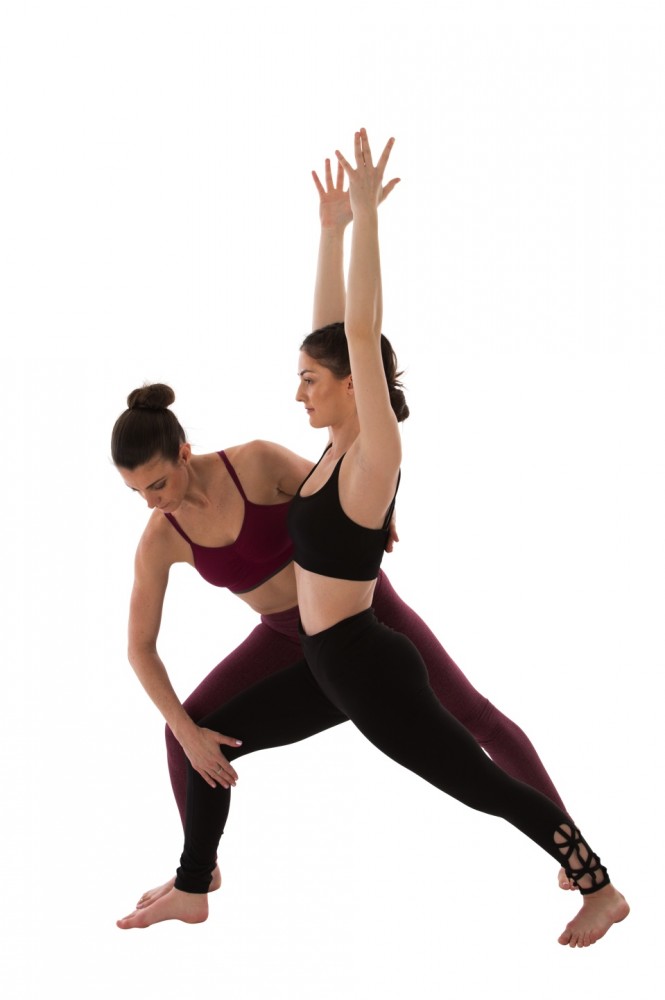
So your whistlestop tour of Warrior 1 is complete, you now know who shouldn't be doing Warrior 1, what the benefits are of Warrior 1, how to bring the student into Warrior 1, what to watch out for and how to assist your student if you need to.
Want to know more?
If you'd like to know more about about the history of the warrior pose you can visit our blog The Story of Virabhadrasana which covers the history of the Warrior poses ..and don't forget we have 200hr Yoga Teacher Training, 300hr Yoga Teacher Training or 500hr Yoga Teacher Training, full syllabus for all of these courses on our website, and if you have any questions please send us an email to info@yogacourse.com


hey there!
.jpg)
We would like our blog to be a place where you learn new things in the world of yoga, when it comes to business of yoga, asanas, philosophy and pranayama.


.jpg)
